
To clean wood furniture properly, first identify the finish, then dust with a dry microfibre cloth, wipe with a barely damp cloth dipped in warm water mixed with two or three drops of mild dish soap, work along the grain, and dry immediately with a second cloth. Never soak the wood, never spray cleaner directly on it, and always test in a hidden spot first.
That answer works for about 90 percent of the wood furniture in your home. The other 10 percent, like waxed oak, shellac antiques, or raw pine, needs a slightly different approach. That is why this sofa upholstery guide (how to clean wood furniture properly) starts with a two-minute test that most cleaning guides skip completely, then walks you through every situation: sticky tables, white rings, black water stains, heat marks, grime that has built up for years, and the right way to polish wood furniture when you are done.
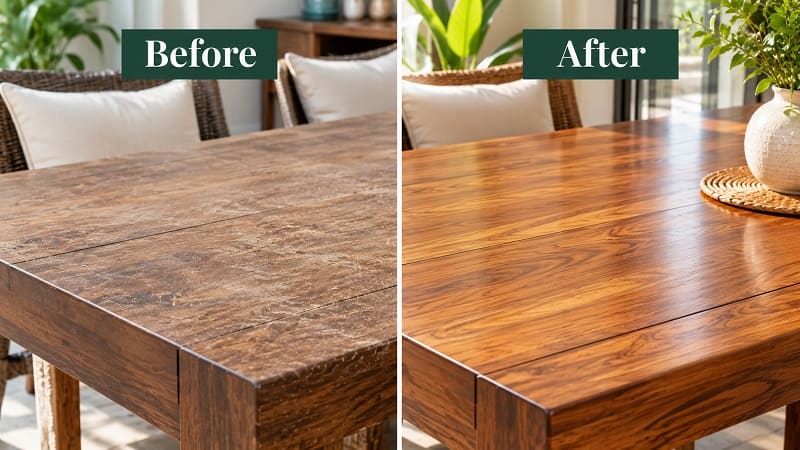
I have cleaned everything from a secondhand sheesham sideboard covered in decades of gummy polish to a brand new lacquered dining table my kids treat like an art desk. The methods below are the ones that actually worked, with exact ratios, so you do not have to guess.
What You Need Before You Start
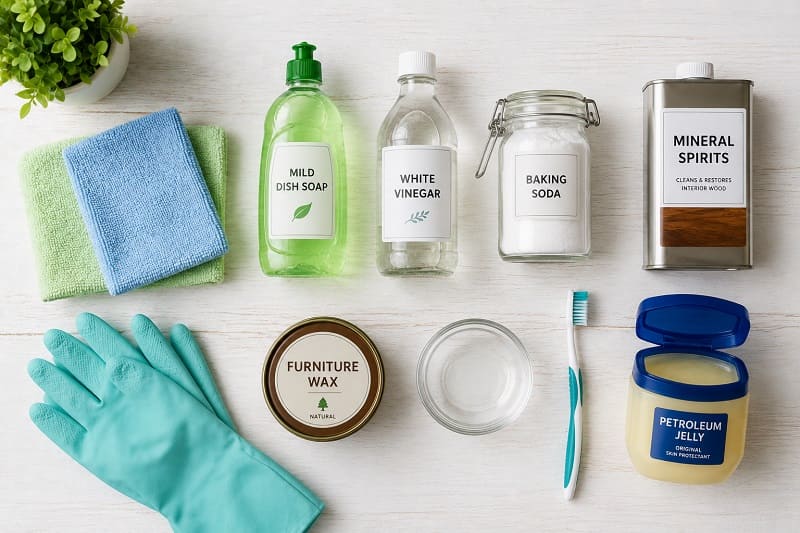
You probably own everything already. Here is the full kit for cleaning wooden furniture:
| Item | What it’s for |
| 2 to 3 microfibre cloths | Dusting, washing, drying (never paper towels, they scratch) |
| Mild dish soap | The main cleaner, 2 to 3 drops per cup of warm water |
| White vinegar | Sticky residue and grime, always diluted |
| Baking soda | Stain paste for marks and ink |
| Non gel toothpaste | White water rings |
| Petroleum jelly | Older watermarks |
| Mineral spirits | Heavy grime and old polish buildup (test first) |
| Furniture wax or beeswax | Protecting waxed and oiled finishes |
| Cotton buds + methylated spirits | The finish test below |
One rule before anything else: never spray any cleaner directly onto wood. Spray or dip the cloth instead. Direct spraying leaves permanent blotchy marks on porous finishes, and it is the single most common mistake people make.
Step 1: Find Out What Finish You Have (The 2 Minute Test)
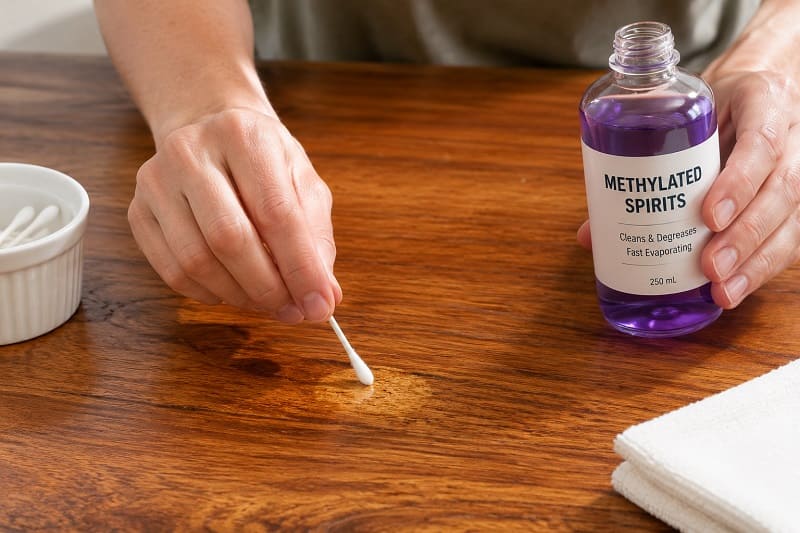
This is the step almost every guide buries or skips, and it is the difference between cleaning your furniture and ruining it. A cleaner that is safe on varnish can dissolve shellac. Water that is fine on lacquer will stain raw wood.
Here is the test. Pick a hidden spot, like the underside of the tabletop or the back of a leg. Dip a cotton bud in methylated spirits (denatured alcohol) and rub it on that spot.
| Test result | Your finish is | How to clean it |
| Finish goes soft or dissolves | Shellac (common on antiques) | Barely damp cloth with mild soap only, nothing else |
| Nothing happens | Varnish, lacquer, or polyurethane | Full soap and water method below, all stain fixes safe |
| Surface feels soft, smears when scratched with a fingernail | Wax finish | Dry dusting mostly, re-wax twice a year, no vinegar |
| Wood looks matte, feels like bare timber, and water darkens it | Oil finish or unfinished wood | Dry cloth only, re-oil when it looks thirsty |
| Painted surface | Painted wood | Damp cloth with mild soap, no abrasives or baking soda |
If you bought the piece new from a mainstream retailer in the last 20 years, it is almost certainly lacquer or polyurethane, which is the easiest type to clean. If it is a family antique or a car boot find, do the test. It takes two minutes and can save a finish that took someone days to apply.
Step 2: How to Clean Wood Furniture (The Core Method)
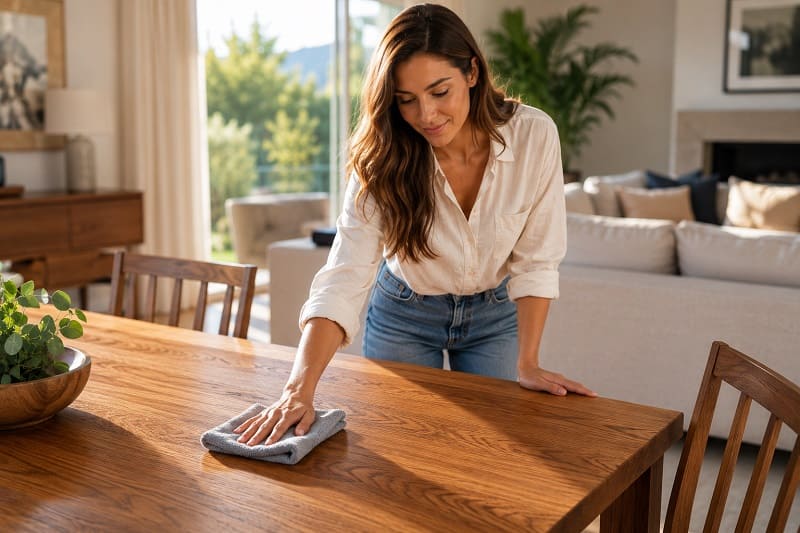
This is the routine for regular cleaning of any sealed finish (e.g., varnish, lacquer, polyurethane, paint).
- Dry dust first. Wipe the whole piece with a dry microfibre cloth. Dust is abrasive, and wiping it up wet is like rubbing fine sandpaper across the surface.
- Mix your cleaner. Add 2 to 3 drops of mild dish soap to a cup of warm water. It should barely bubble. If it looks like washing-up water, it is too strong.
- Dampen, don’t soak. Dip the cloth, then wring it out hard. The cloth should feel damp against your cheek, not wet. Wood swells when it absorbs water, and swelling is permanent.
- Wipe with the grain. Work in the direction of the wood grain, not circles. Going with the grain hides any micro scratches inside the natural lines of the wood.
- Rinse wipe. Go over the surface once more with a clean cloth dampened in plain water to lift soap residue.
- Dry immediately. Buff dry with your third cloth. Never let moisture sit, even for a few minutes.
That is the whole job for weekly or monthly cleaning. Real example: my kids’ fingerprints and cereal splashes on a lacquered oak table come off completely with this method in under five minutes. If something does not come off, do not scrub harder. Move to the targeted fixes below instead, because pressure is what damages finishes, not the right cleaner.
How to Deep Clean Grimy or Sticky Wood Furniture
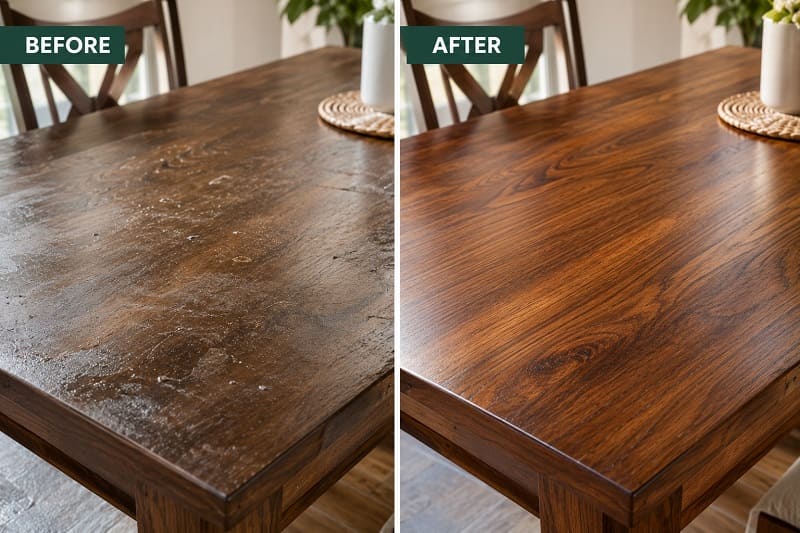
If a table or dresser feels sticky or looks dull under a grey film, the problem is usually not dirt. It is years of furniture polish, cooking grease, and hand oils bonded together. Soap alone will not shift it.
The diluted vinegar method
Vinegar cuts through sticky buildup, but it must be diluted because the acid can dull finishes over time.
- Mix 2 teaspoons of white vinegar into 250ml of warm water. For kitchen grease, add one small drop of dish soap.
- Dampen your cloth, wring it well, and test it on a hidden spot.
- Wipe with the grain, refolding the cloth to a clean side as it picks up grime. You will actually see the brown residue transfer to the cloth, which is oddly satisfying.
- Rinse and wipe with plain water, then dry straight away.
Do not use this on shellac or wax finishes. Vinegar softens both.
The mineral spirits method (for the worst buildup)
For decades of old polish, like on a secondhand find, mineral spirits dissolve the buildup without touching most cured finishes. Work in a ventilated room, apply with a cloth in small sections along the grain, and wipe off with a clean cloth before it dries. Test on a hidden area first, every time. When I cleaned that sheesham sideboard, mineral spirits took off a sticky brown layer that three rounds of soap and water had not even dented, and the original grain came back like the piece was new.
Why does your table get sticky in the first place
Aerosol furniture polishes, especially silicone-based ones, build up in layers. Each new spray sticks to the last one and traps dust. If you stop using spray polish and switch to the soap and water routine above, the stickiness will not come back.
How to Remove Stains From Wood Furniture
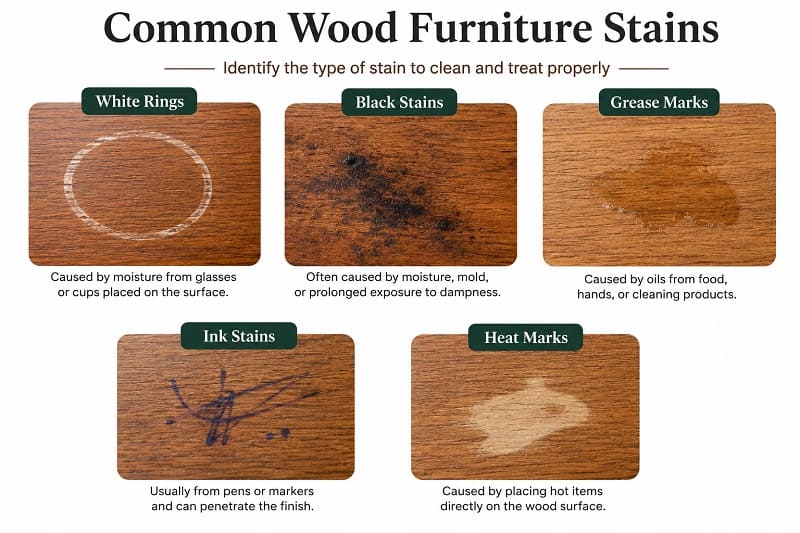
Different stains need different fixes, and using the wrong one wastes your time. This table covers every common mark; then the tricky ones get full instructions below.
| Stain | Cause | Fix |
| White ring or cloudy mark | Moisture trapped in the finish (hot mug, wet glass) | Toothpaste method or petroleum jelly overnight |
| Black or dark stain | Water soaked through the finish into the wood | Needs sanding and refinishing, or oxalic acid wood bleach |
| White heat mark | Hot pan or pizza box | Iron and cotton cloth method |
| Ink or marker | Pens, kids | Baking soda paste, left for 2 to 3 minutes |
| Grease | Cooking, hands | Dish soap solution, then vinegar solution if needed |
| Candle wax | Spills | Harden with ice, lift off, warm residue with a hairdryer through a cloth |
| Crayon | Kids | A tiny amount of mayonnaise, sit for 5 minutes, wipe off |
White rings: the toothpaste method
White rings mean moisture is trapped in the finish, not the wood, so they are very fixable.
- Put a pea-sized amount of plain white non-gel toothpaste on a soft cloth.
- Rub gently along the grain for 30 to 60 seconds. The mild abrasive polishes the cloudiness out of the finish.
- Wipe clean with a damp cloth, dry, and check. Repeat once if needed.
For rings that have been there for months, spread a thin layer of petroleum jelly over the mark and leave it overnight. The oil slowly displaces the trapped moisture. Wipe it off in the morning.
Black stains: know when to stop
Here is what most guides will not tell you. If the stain is black or dark brown, the water got past the finish and reacted with tannins inside the wood itself. No surface trick will remove it. Your options are sanding back and refinishing that area, or applying oxalic acid wood bleach and refinishing. If the piece is valuable or antique, this is the point to call a restorer. Knowing the difference between white and black stains saves you an afternoon of pointless scrubbing.
Heat marks: the iron trick
For white haze left by a hot dish, lay a clean cotton tea towel over the mark, set an iron to low with no steam, and press it on the towel for 10 to 15 seconds. Lift and check. The gentle heat releases the trapped moisture. Repeat in short bursts. It feels wrong to put an iron near a heat mark, but this is the standard fix, and it works.
How to Polish Wood Furniture Properly
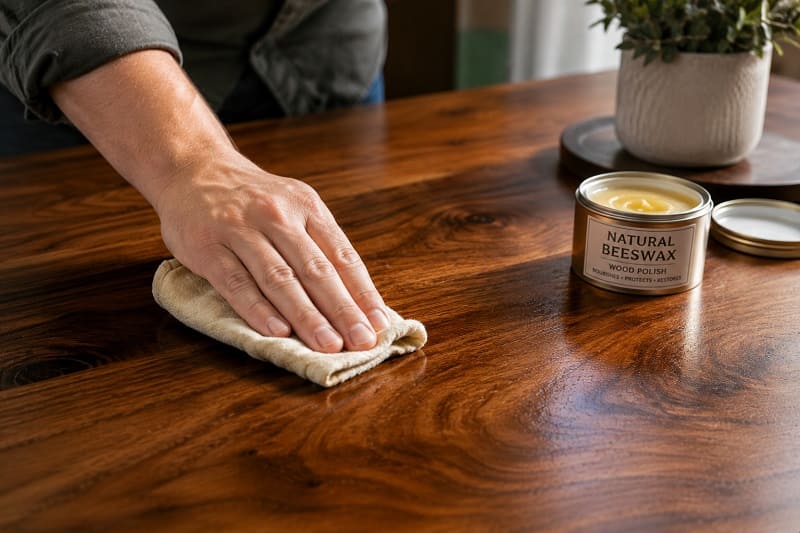
Polishing is where good intentions damage the most furniture, so let’s clear up the two biggest myths.
Myth one: more polish is better. Polish is for shine, not protection, and most modern lacquered furniture never needs it at all. Once a month is the absolute maximum, and only on pieces that look dull.
Myth two: olive oil makes a great homemade polish. You will see the olive oil and vinegar recipe everywhere, including in most of the top-ranking guides for this topic. The problem is that olive oil is a food oil. It never fully dries, it goes rancid, and over weeks it turns into a gummy film that attracts dust. If you want a homemade polish, swap in an oil that does not spoil.
A homemade polish that actually works
Mix 3 parts food-grade mineral oil (or walnut oil) with 1 part white vinegar in a jar and shake. Dip a soft cloth, wring out the excess, wipe along the grain, then buff with a dry cloth until nothing transfers to your fingers. The vinegar lifts light grime while the oil feeds the sheen.
Choosing a shop-bought polish
| Choose | Avoid | Why |
| Silicone-free cream or spray polish | Silicone-based aerosols | Silicone builds a gummy layer that is hard to remove and complicates future refinishing |
| Beeswax paste (for waxed and oiled finishes) | Anything with ammonia | Ammonia can blacken oak and yellow-painted pieces |
| Products labelled for your finish type | “One product for everything” sprays | Wood finishes are not interchangeable |
For waxed furniture, apply a thin coat of beeswax with a lint-free cloth along the grain, wait 15 minutes, then buff. Twice a year is enough. For oiled finishes, reapply the matching oil (often Danish or tung oil) when the wood starts to look pale and dry.
Cleaning Different Types of Wood: Quick Reference
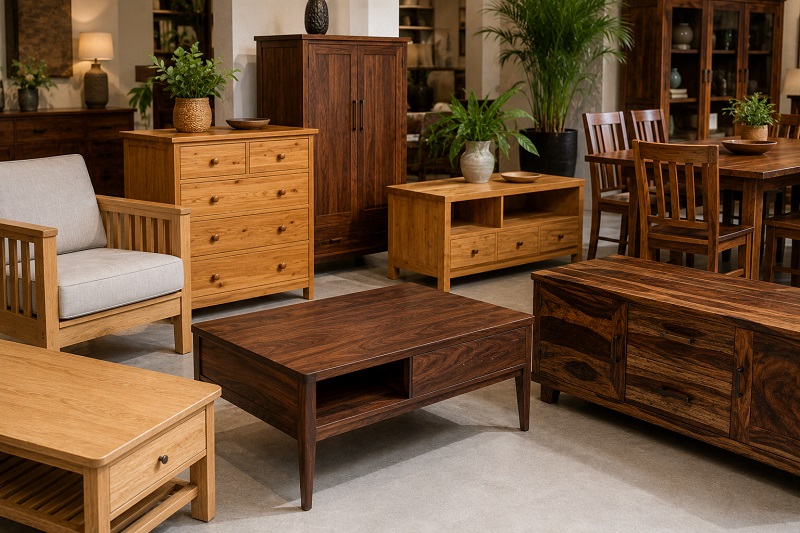
The core method works everywhere, but each timber has one or two quirks worth knowing.
| Wood type | What to know |
| Oak | Never use ammonia-based cleaners; they react with tannins and blacken the wood |
| Pine | Soft and dents easily, so no scrubbing pressure and no abrasive pastes |
| Teak | Naturally oily, needs no polish indoors, just soap and water |
| Walnut | Dark grain shows dust and smears fast; buff dry thoroughly to avoid streaks |
| Mango and sheesham | Tropical woods that hate dry heat, keep away from radiators, and re-wax with beeswax twice a year |
| Veneer and MDF | The wood layer is paper thin, so use the least moisture of all and never sand stains |
| Painted wood | Mild soap only, no baking soda or toothpaste, both dull the paint |
How Often Should You Clean Wood Furniture?
| When | What to do |
| Straight away | Blot spills; never rub them, especially tea, coffee, and red wine |
| Weekly | Dry dust with a microfibre cloth |
| Monthly | Soap and water wipe down, polish only if dull |
| Every 6 months | Re wax waxed pieces, re oil oiled pieces, check and tighten fittings |
| Yearly | Deep clean with the vinegar method, inspect for loose joints, and sun fading |
A note on humidity, because it matters more than most cleaning does. Wood keeps absorbing and releasing moisture forever, so it shrinks near radiators and swells in damp rooms. Keep furniture at least a metre from heat sources, out of direct sunlight, and if you live somewhere humid, a room kept around 40 to 60 percent humidity will do more for your furniture than any product you can buy.
What You Should Never Use on Wood Furniture
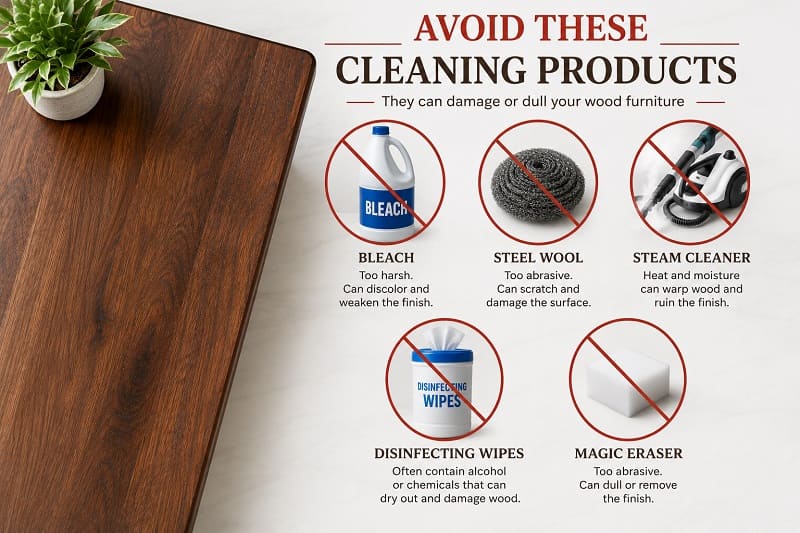
Half of cleaning wood properly is knowing what to keep away from it.
| Never use | What it does |
| Disinfecting wipes and all-purpose sprays | Alcohol and ammonia eat through finishes and leave dull patches |
| Undiluted vinegar or lemon juice | The acid etches and dulls the finish over time |
| Magic erasers | They are micro abrasive and sand the sheen right off |
| Steam cleaners | Force hot moisture straight through the finish into the wood |
| Bleach | Discolours wood and breaks down finishes |
| Steel wool and scouring pads | Permanent scratching (the one exception is 0000 grade wool used deliberately before re-waxing) |
| Silicone spray polishes | Sticky buildup that ruins the surface for future refinishing |
| Baby wipes | The moisturisers in them leave a film on the finish |
How to Clean Old or Antique Wood Furniture
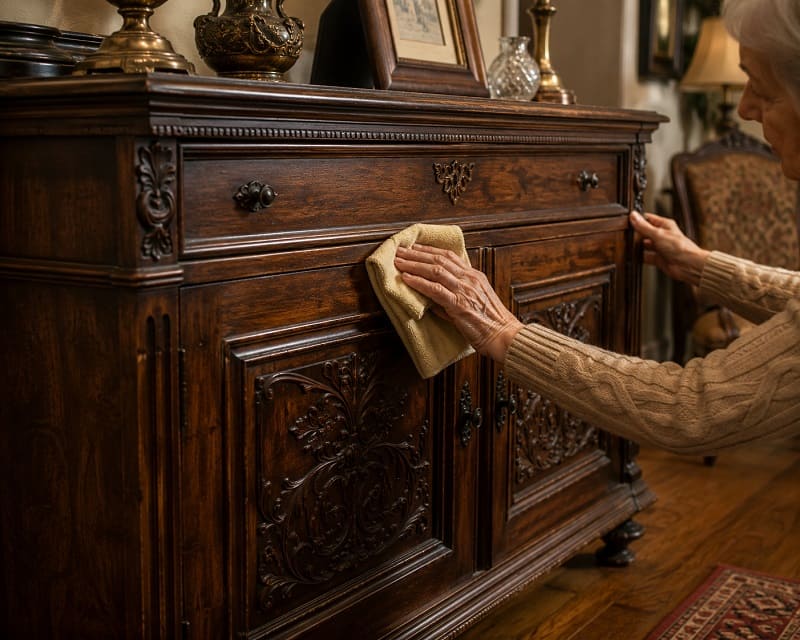
Older pieces deserve extra caution, for two reasons. First, they are more likely to have shellac or wax finishes that modern cleaners destroy. Second, on genuine antiques, the mellow surface colour that builds over decades, called patina, is part of the value. Strip it, and you can halve what the piece is worth.
So the routine for anything old is: do the finish test from Step 1, then start with the gentlest option and stop as soon as the piece looks clean. Dry dust, then a barely damp cloth with mild soap, then dry. If it is shellac, stop there. If the test showed a tough modern finish, you can carefully use the vinegar or mineral spirits methods for buildup. If you are ever unsure on a valuable piece, a professional restorer costs far less than a ruined antique.
Disinfecting secondhand furniture
Bought a piece from a charity shop or online marketplace and want it properly cleaned before it comes inside? Wipe every surface, including inside drawers, handles, and undersides, with the soap and water method, then go over it with the diluted vinegar solution and dry thoroughly. For musty smells, put an open bowl of baking soda inside each drawer or cupboard and leave it for a week. It absorbs odours better than any spray, and it costs pennies.
7 Mistakes That Ruin Wood Furniture
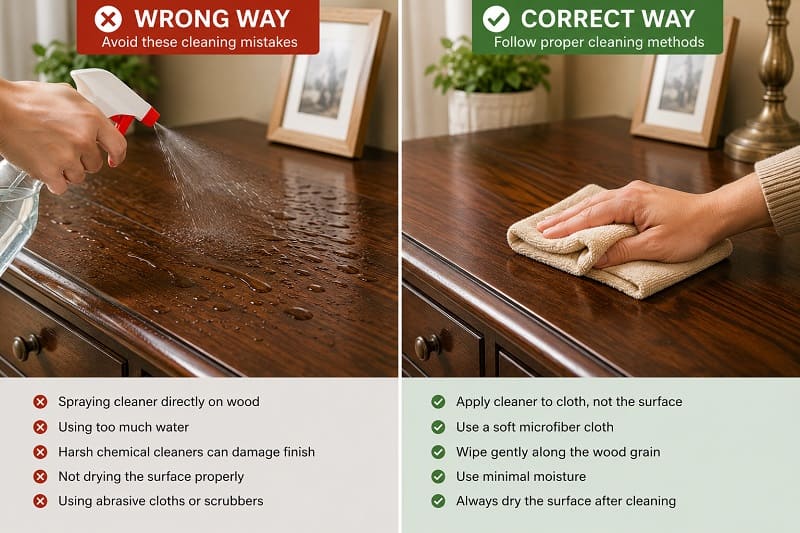
- Spraying cleaner directly on the surface. It soaks in unevenly and leaves permanent marks. Always spray the cloth.
- Using too much water. Swollen, warped wood cannot be shrunk back. Damp cloth, immediate drying, every time.
- Skipping the dry dust. Wet dust scratches. Dry cloth first, always.
- Over polishing. Weekly spray polishing is how tables end up sticky. Monthly at most, and only if dull.
- Rubbing spills. Rubbing pushes liquid into the grain. Blot straight down with a dry cloth instead.
- Ignoring sunlight and radiators. UV bleaches wood unevenly, and heat cracks it. Also, rotate the ornaments sitting on surfaces so the wood underneath ages at the same rate.
- Dragging instead of lifting. Dragging strains joints and scratches floors. And one odd tip worth stealing from furniture makers: keep rubber and PVC items like yoga mats and cable ties off wood surfaces, because prolonged contact can chemically damage the finish.
The Bottom Line
Cleaning wood furniture properly comes down to a short list of habits: know your finish, dust dry before you wipe wet, keep water to a minimum, work with the grain, dry immediately, and stay away from harsh sprays and silicone polish. Do that, and a solid wood table will not just survive daily life with mugs, kids, and dinners; it will look better in ten years than it does now. Wood is one of the only materials in your home that rewards care with character, so give it five minutes a week, and it will outlast everything else you own.
People Also Ask
What is the best thing to clean wood furniture with?
A microfibre cloth dampened in warm water with two or three drops of mild dish soap is the best and safest cleaner for sealed wood furniture. Wring the cloth almost dry, wipe along the grain, and dry the surface immediately. Specialist wood cleaners work too, but plain diluted soap handles everyday cleaning just as well for a fraction of the price.
Is vinegar safe to clean wood furniture?
Yes, if it is properly diluted. Mix 2 teaspoons of white vinegar into 250ml of warm water, and it is safe on varnished, lacquered, and polyurethane finishes. Never use vinegar undiluted, and never use it on shellac, wax finishes, or bare wood, because the acid damages all three.
How do you clean wood furniture without damaging the finish?
Use minimal moisture, no pressure, and no harsh chemicals. Dust dry first, wipe with a well-wrung cloth and mild soap solution, work with the grain, and dry straight away. Test anything new on a hidden spot, and avoid alcohol, ammonia, bleach, and abrasive pads entirely.
How do you get years of grime off wood furniture?
Start with the diluted vinegar solution (2 teaspoons in 250ml warm water, plus a drop of dish soap). If the grime is decades of old polish buildup, dampen a cloth with mineral spirits and work small sections along the grain, then wipe clean and dry. Mineral spirits dissolve buildup that soap cannot touch without harming most cured finishes.
How do you remove white rings from a wood table?
Rub a small amount of plain non-gel toothpaste along the grain over the ring for 30 to 60 seconds, then wipe and dry. For stubborn or old rings, cover the mark with petroleum jelly overnight and wipe it away in the morning. If the mark is black rather than white, the water has penetrated the wood and the area needs refinishing.
What should you not clean wood furniture with?
Avoid disinfecting wipes, all-purpose sprays, undiluted vinegar, bleach, ammonia, magic erasers, steam cleaners, steel wool, and silicone-based spray polishes. All of these either strip the finish, scratch the surface, or leave a buildup that ruins the wood over time.
How often should wood furniture be polished?
Once a month at most, and only when the surface looks dull. Modern lacquered furniture often never needs polish at all. Waxed and oiled finishes are different: they need a fresh coat of wax or oil roughly every six months to stay protected.
Can I use furniture polish spray every week?
You should not. Spray polishes, especially silicone-based ones, build up layer over layer and leave the surface sticky, dull, and dust-hungry. If your furniture already feels tacky from years of spray polish, the mineral spirits method above will remove the buildup.