
Leather furniture does not fail because it is old. It fails because someone cleaned it with the wrong product, on the wrong type of leather, at the wrong time. Once that happens, cracking and fading are hard to undo.
Knowing how to clean leather furniture properly comes down to two things. You need to know what type of leather you actually have, and you need to know which method matches that type. Everything else in this guide builds on those two facts.
What Counts as Leather Furniture

Leather furniture is not just couches. The same care rules in this guide apply to a wide range of pieces found in homes and offices.
Common leather furniture includes custom made sofas and couches, loveseats, sectionals, and recliners. It also includes armchairs, accent chairs, and ottomans or footstools.
Dining chairs, bar stools, and bench seating often use leather or faux leather upholstery as well. So do office chairs, which see heavy daily use and body oil buildup on the armrests.
Headboards, storage benches, and even some coffee tables with leather-wrapped tops fall into this category too. If it has a leather or faux leather surface, the cleaning and conditioning principles below apply, though the exact frequency depends on how much daily contact and sun exposure that specific piece gets.
How to Clean Leather Furniture in 4 Steps
If you only have five minutes, here is the short version. Vacuum the surface and crevices with a soft brush attachment to remove grit before it scratches the leather. Wipe it down with a slightly damp microfiber cloth, using plain water or a pH neutral leather cleaner, never a household soap.
Let it air dry away from sunlight or heat vents. Then apply a leather conditioner every six to twelve months to replace the oils that regular use strips away.
The exact products and pressure you use depend on your leather type, which is covered in full detail below. Skipping that step is where most DIY leather cleaning goes wrong.
Why Cleaning Leather the Wrong Way Ruins It
Leather is skin, and like skin, it depends on natural oils to stay flexible. It also has a surface finish, sometimes thick, sometimes almost nonexistent, that determines how much protection it has against spills and moisture.
Dish soap, baby wipes, alcohol based cleaners, and anything with fragrance or detergent is designed to break down oil. That is exactly what makes those products good at cleaning kitchen counters. It is also exactly what makes them harmful on leather.
Every time you use one of these products, you strip away a small amount of the oil that keeps the leather’s fiber structure supple. It will not look damaged the first time, or even the tenth time. But the effect is cumulative, and it builds quietly in the background.
Over months, the leather loses elasticity. The surface starts to feel dry or papery instead of soft, and eventually it cracks under normal flexing. This usually happens right at the seat edges and the arms, since those areas flex the most every time someone sits down.
This is why a leather couch can look perfectly fine for a year and then suddenly seem to fall apart within a few weeks. It is almost never sudden damage. It is months of the wrong product finally catching up with the material.
Step 1: Identify Your Leather Type Before You Clean Anything
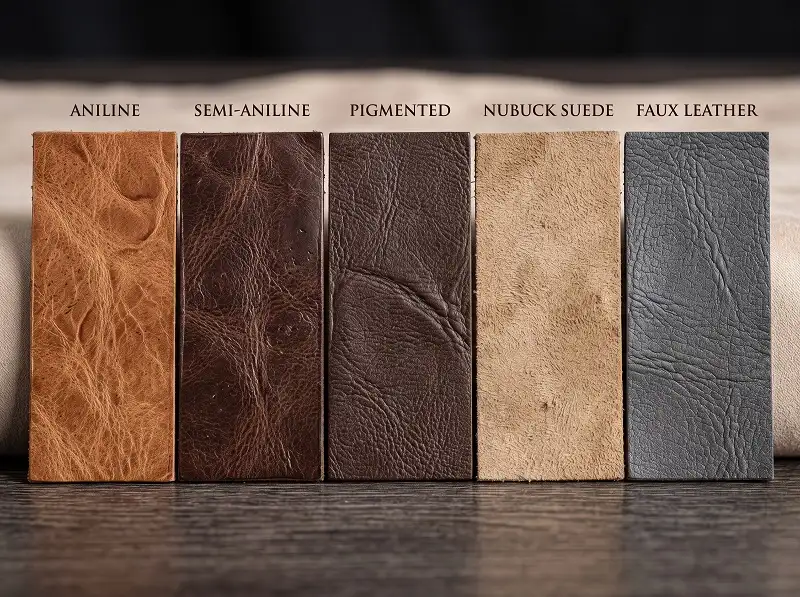
This is the step every generic cleaning guide skips, and it is the single most important decision you make before touching any cleaner. The same method that is safe on one type of leather can permanently stain or dry out another.
Leather furniture generally falls into four main categories, plus one non-leather category people often confuse with the real thing. The table below breaks down how each one behaves and what it needs.
| Leather Type | What It Looks and Feels Like | Absorbency | Safe Cleaning Approach | Conditioning Needs |
| Aniline | Full grain, natural markings, scars and wrinkles visible, softest hand feel | Very high, absorbs liquid almost instantly | Barely damp cloth only, no soap directly on the surface, always spot test | Most frequent, every 4 to 6 months |
| Semi-Aniline | Light protective topcoat, slightly more uniform color than aniline | Moderate | Slightly damp cloth with a mild, leather safe cleaner | Every 6 months |
| Pigmented (Protected) | Polymer coating, uniform color, most common on mass market sofas | Low, resists stains well | Can handle a damp cloth and mild leather cleaner without much risk | Every 6 to 12 months |
| Nubuck or Suede | Napped, velvety texture, no topcoat at all | Extremely high, stains and water marks easily | Dry brush only, specialty suede cleaner for stains, avoid water entirely | Does not use standard leather conditioner, needs a suede protectant spray instead |
| Faux, Bonded, or PU | Synthetic surface over fabric or bonded fiber backing, no real hide | Low, but the coating can peel with harsh chemicals | Mild soap and water is generally fine | Does not need oil based conditioner, occasional PU cleaner instead |
Aniline leather is the most natural and the most expensive to replace if damaged. It has little to no protective coating, so every pore and wrinkle stays visible.
That same lack of coating means it drinks up liquid almost immediately. A spilled glass of wine can turn into a permanent stain within minutes if it is not caught fast.
Semi-aniline leather has a very light topcoat. It is thin enough that the leather still looks and feels natural, but thick enough to buy you more forgiveness during cleaning and more resistance to staining.
Pigmented or protected leather is what most people actually own. It has a polymer coating applied to the surface, which is why it looks more uniform in color and pattern than aniline leather.
This coating is what lets manufacturers sell leather furniture that survives kids, pets, and daily use without careful handling. It is far more tolerant of cleaning products, though tolerant does not mean immune to damage from harsh chemicals used repeatedly.
Nubuck and suede are technically leather, but they behave completely differently from the other types on this list. They have a soft, brushed nap instead of a smooth surface, and no protective topcoat at all.
Water spots on suede and nubuck are almost impossible to fully remove once they set. If your furniture has this texture, treat it as its own category rather than following any of the standard leather steps in this guide.
Faux, bonded, and PU leather are not animal hide at all. Faux leather is synthetic material made to look like leather. Bonded leather is scrap leather fiber glued to a fabric backing, and PU leather has a polyurethane coating over a fabric base.
None of these need the oils that real leather needs. An oil based conditioner will often leave a greasy, sticky film instead of doing anything useful. Mild soap and water is usually the safest approach for this category.
If you are not sure which type you have, check the manufacturer’s care tag. It is usually found under a cushion or on the back of the frame, or in the original paperwork that came with the furniture.
This one piece of information will save you from guessing through the rest of this guide.
What Do the Leather Cleaning Codes (W, S, WS, X) Mean?
Furniture manufacturers print a cleaning code on the care tag, and almost nobody knows what it means. It is one of the fastest ways to avoid an expensive cleaning mistake.
| Code | What It Means | What You Can Use |
| W | Water based cleaning is safe | A water dampened cloth or water based leather cleaner |
| S | Solvent only, no water | A dry cleaning solvent made for upholstery, no water at all |
| WS | Either water or solvent based cleaning is safe | Water based or solvent based cleaner, whichever you have |
| X | No liquid cleaners at all | Vacuum only, no water, no solvent |
A code of W means the manufacturer has tested the material and confirmed water based products will not stain or damage it. A code of S means the opposite.
Water can cause staining, shrinking, or ring marks on materials coded S, so only a solvent based cleaner should touch that piece. WS gives you flexibility to use either type of cleaner.
X is the strictest code. It is usually found on delicate materials that cannot tolerate any liquid, meaning vacuuming and dry dusting are your only safe options.
Checking this code takes about five seconds and prevents the majority of avoidable leather damage. If there is no tag or the code has worn off, treat the piece as if it were coded S or X until you can confirm otherwise.
How Often You Should Actually Clean Leather Furniture
Leather does not need daily attention, but it does need a consistent rhythm. Skipping maintenance for months and then doing one deep clean is actually harder on the leather than staying consistent with lighter care.
| Task | Recommended Frequency | Why |
| Dry dusting | Weekly | Removes grit before it grinds into the surface during normal use |
| Damp wipe down | Monthly | Clears body oil buildup on armrests, headrests, and seat cushions |
| Deep clean with leather cleaner | Every 3 to 6 months | Lifts embedded dirt that a simple wipe does not fully remove |
| Conditioning | Every 6 to 12 months | Replaces natural oils lost to use, sunlight, and cleaning |
| Full inspection for cracking or wear | Every 6 months | Catches early damage before it becomes structural |
If the furniture sits in direct sunlight, or if it is a family couch that gets heavy daily use, lean toward the more frequent end of every range in this table.
A piece near a sunny window may realistically need conditioning three to four times a year. UV exposure dries leather out faster than normal use does, even if the couch barely gets sat on.
A piece in a formal living room used a few hours a week can often stretch toward the longer end of each interval without any issue.
What You’ll Need to Clean Leather Furniture Properly
| Supply | Purpose |
| Vacuum with soft brush attachment | Removes dust and grit from seams and crevices before wiping |
| 2 to 3 clean microfiber cloths | Gentle on the surface, will not scratch during wiping or buffing |
| Distilled water | Tap water minerals can leave faint marks on some leather over time |
| pH neutral, leather specific cleaner | Cleans without stripping natural oils, check the W, S, or WS code first |
| Leather conditioner matched to your leather type | Replaces oils and keeps the surface flexible |
| Cotton swabs | Precise application for small stains like ink |
The Step-by-Step Cleaning Process
Step 1: Vacuum and Dust
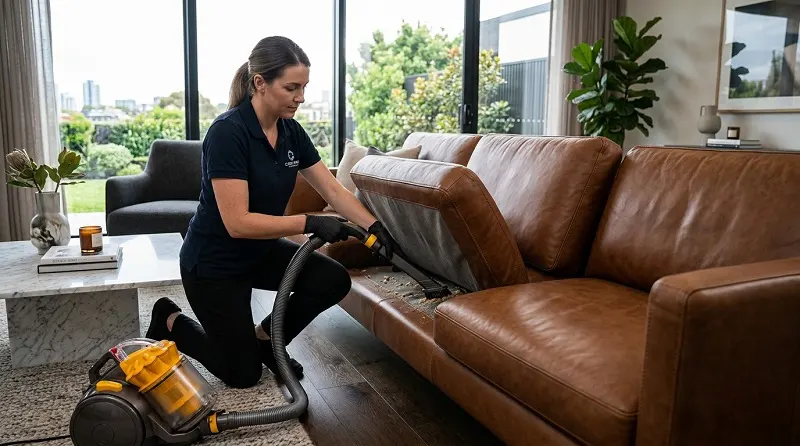
Remove cushions if possible and vacuum the seams, crevices, and the underside of the furniture first. This is where crumbs, pet hair, and fine grit collect.
That grit is exactly what causes tiny scratches during wiping if you skip straight to a damp cloth. This step takes two minutes and prevents avoidable surface damage.
Step 2: Spot Test
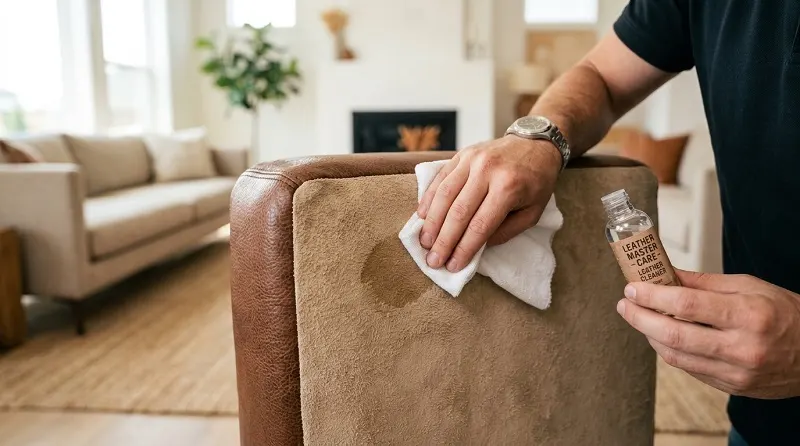
Pick a hidden spot, such as the underside of a cushion or the back of an armrest. Test your cleaner there first before touching any visible area.
Apply a small amount, wait two to three minutes, and check for color change, darkening, or texture change. Skipping this step is the single most common reason DIY leather cleaning goes wrong, because reactions vary between pieces that look identical.
Step 3: Clean With the Right Solution
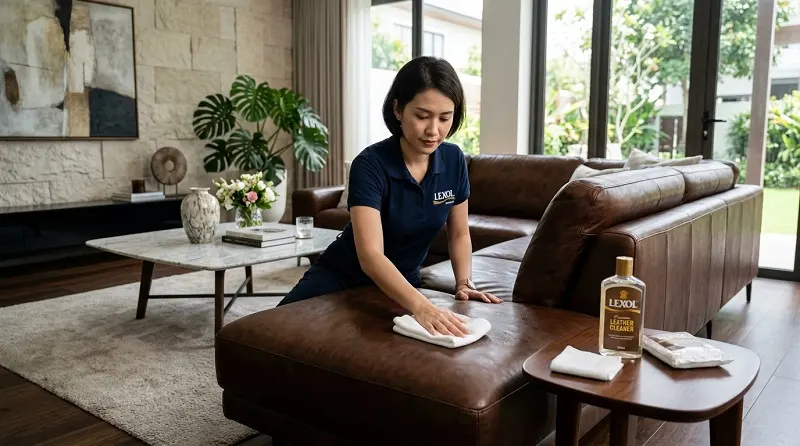
Dampen a cloth, never the leather itself, with water or your leather safe cleaner. Wipe in small circular motions, working one section at a time rather than the whole piece at once.
Rinse and wring the cloth frequently so you are lifting dirt away rather than pushing it back into the surface. Fresh, clean cloth sections make a bigger difference than most people expect.
Step 4: Dry Properly

Let the leather air dry naturally in a well ventilated room, which usually takes a few hours depending on humidity. Do not use a hairdryer, a space heater, or direct sun to speed this up.
Forced, fast drying pulls moisture out unevenly, and that uneven drying is a common cause of cracking that shows up weeks later, not immediately.
Step 5: Condition
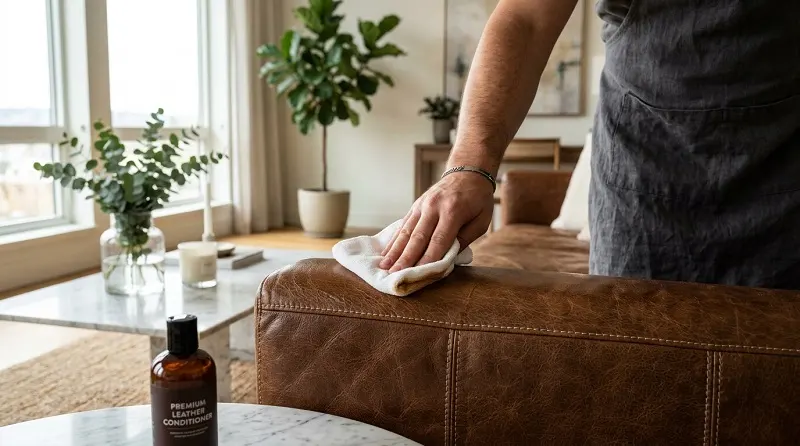
Once the leather is completely dry, apply a small amount of conditioner to a clean cloth. Work it into the surface using circular motions, section by section rather than all at once.
Let it absorb for the time listed on the product label, typically 15 to 60 minutes. Then buff off any remaining residue with a dry cloth until the surface feels smooth rather than tacky.
How to Remove Specific Stains From Leather Furniture
| Stain Type | What To Do | What To Avoid |
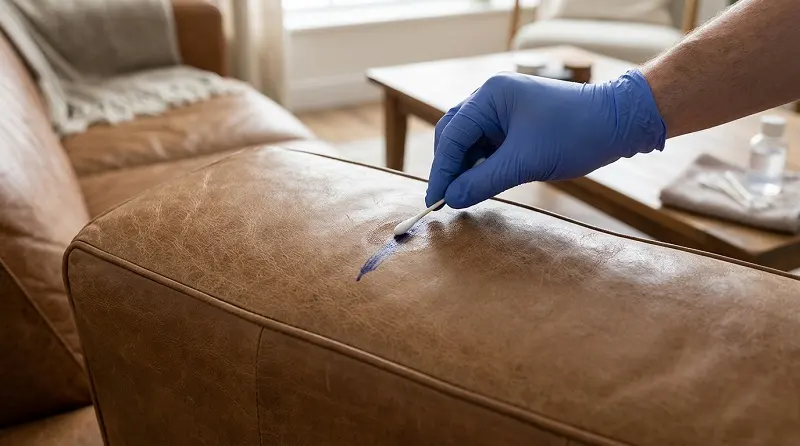
| Ink | Dab with a cotton swab lightly dampened in rubbing alcohol, test first | Rubbing, which spreads ink deeper into the pores |
| Grease or oil | Blot excess, then cover with cornstarch or baking soda for several hours to absorb it, brush away | Adding water, which can spread the oil further |
| Blood or wine | Blot immediately with a dry cloth, then use a cloth dampened with cold water | Hot water, which can set protein based stains permanently |
| Pet urine or odor | Blot immediately, clean with diluted leather safe cleaner, place an open box of baking soda nearby for lingering odor | Scrubbing, which pushes liquid deeper into the leather |
| Mold or mildew | Wipe with a cloth dampened in a 50/50 rubbing alcohol and water mix, ventilate the room afterward | Leaving the area damp or unventilated, which lets mold return |
| Water rings | Usually fade on their own as the leather dries evenly | Scrubbing the ring, which can distort the surrounding finish |
| Sun fade | Needs a leather colorant or refinishing product matched to the shade | Assuming cleaning alone will restore lost pigment, it will not |
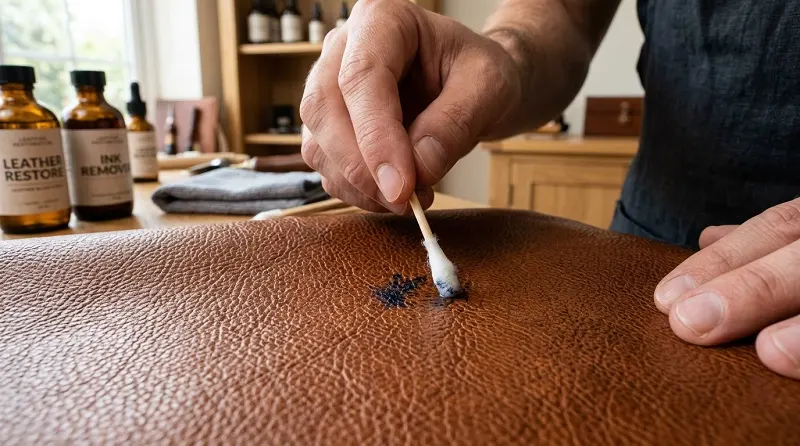
A few of these deserve more explanation. For ink, the instinct is almost always to rub at it, and that instinct makes the stain worse. Rubbing drives the ink deeper into the leather’s pores instead of lifting it off the surface.
For grease, water is the wrong tool entirely. Oil and water do not mix, and the water can end up spreading the grease into a larger, fainter stain around the original spot.
For pet odor specifically, the smell usually comes from urine that has soaked slightly below the surface. This is why simply wiping the visible area often does not fully resolve the problem.
An open box of baking soda placed nearby for a day or two absorbs odor from the surrounding air. This handles the smell even after the visible stain itself is already gone.
What Never to Use on Leather Furniture
| Product | Why It Damages Leather |
| Dish soap or household detergent | Strips natural oils, leading to dryness and cracking over time |
| Baby wipes or disinfecting wipes | Often contain alcohol or fragrance additives not formulated for leather |
| Magic erasers | A mild abrasive that can wear through the leather’s protective finish |
| Ammonia or bleach based cleaners | Too harsh, can discolor and break down the leather’s fiber structure |
| Direct heat, hairdryers, or heaters | Dries leather unevenly and too fast, a common cause of cracking |
| Furniture polish meant for wood | Not formulated for leather, can leave a residue that attracts more dust |
How to Protect Leather Furniture So It Stays Clean Longer

Keep leather furniture at least a few feet from direct sunlight and heat vents. Both dry out the natural oils over time, often faster than regular use does.
Maintain moderate indoor humidity, ideally somewhere in the 40 to 55 percent range. Very dry indoor air pulls moisture from leather just as effectively as sun exposure does, while overly humid air encourages mold growth.
Rotate cushions periodically so wear and fading happen evenly across the piece. Without rotation, the seat that gets used most will visibly age faster than the rest of the furniture.
A UV protectant spray formulated specifically for leather can add an extra layer of defense. This matters most for furniture that sits near a window with significant daily sun exposure.
When to Call a Professional Instead of DIY-ing It
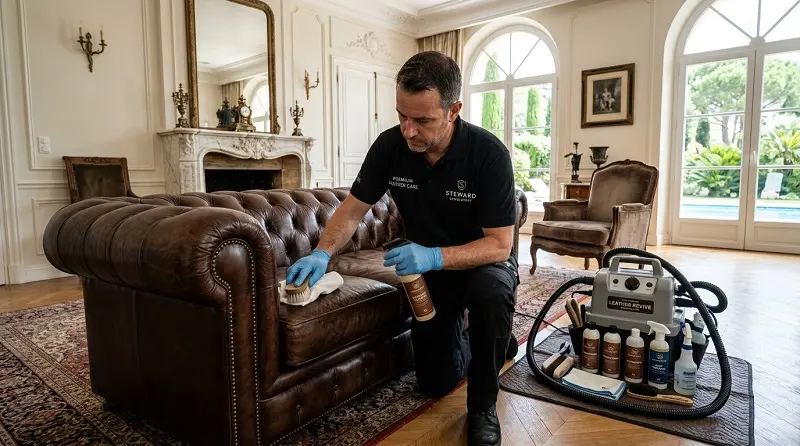
Some situations are worth handing to a professional upholstery cleaner rather than attempting at home. This includes deep, set-in stains that have been present for weeks or longer, and large or recurring areas of mold.
It also includes visible cracking or peeling of the leather’s surface, and antique or high value pieces where a mistake would be costly to reverse. In these cases, the risk of making things worse outweighs the savings of doing it yourself.
DIY methods work well for regular maintenance and fresh stains caught early. But once leather has structural damage like cracking or peeling, home remedies typically accelerate the damage rather than fix it.
Most home fixes cannot rebuild the leather’s fiber structure once it has already broken down. A professional has access to repair compounds and techniques that go beyond surface cleaning.
Final Thoughts
Cleaning leather furniture properly is not complicated once you know your leather type and respect a few boundaries. No harsh soap, no direct heat, no skipping the spot test.
Do the basics consistently. Dust weekly, wipe monthly, condition twice a year.
Your furniture will develop the kind of worn in character that leather is known for. That is the opposite of the cracks and dullness that come from neglect or the wrong products.
Frequently Asked Questions
Can I use vinegar to clean leather furniture? A diluted vinegar and water solution can work on some pigmented leathers. It is too acidic for aniline leather, though, and can strip color or dry the surface out with repeated use. Test it on a hidden area first, and treat it as an occasional solution rather than a regular cleaner.
Is Dawn or another dish soap safe for leather couches? No. Dish soap is formulated to cut grease and strip oils, which is exactly what you do not want on leather. It will dry the material out over time even if the couch looks fine right after one use.
How do I get sweat or body oil stains out of a leather couch? Wipe the area with a cloth dampened in a mild, leather safe cleaner, then condition once it is fully dry. Body oils build up gradually on armrests and headrests, so a monthly wipe down prevents this from ever becoming a visible, set-in stain.
Does leather furniture really need conditioner, or is cleaning enough? Cleaning removes dirt, but it does not replace the natural oils that keep leather flexible. Skipping conditioner entirely is one of the main reasons leather furniture cracks years before it should.
Can cracked leather be fixed, or does the furniture need to be replaced? Minor surface cracking can sometimes be improved with a deep conditioning treatment or a leather repair kit designed to fill and blend small cracks. Deep structural cracks usually need a professional repair, and severe cases may not be fully reversible, which is why regular conditioning matters so much as prevention.
How do I clean faux leather furniture differently from real leather? Faux leather can generally handle a mild soap and water solution without harm, since it lacks the natural oils real hide depends on. It does not need an oil based conditioner, and using one meant for real leather can leave a sticky or greasy residue on the synthetic surface instead of any real benefit.
How can I tell if my furniture is real leather or faux leather? Real leather has natural pore patterns and slight color variation across the piece. It feels warm and slightly textured to the touch, and typically has a faint natural smell. Faux leather tends to have a more uniform, repeating pattern, feels cooler and more plastic-like, and has little to no natural smell. Checking the manufacturer’s tag is the most reliable method if the visual and tactile differences are not obvious.